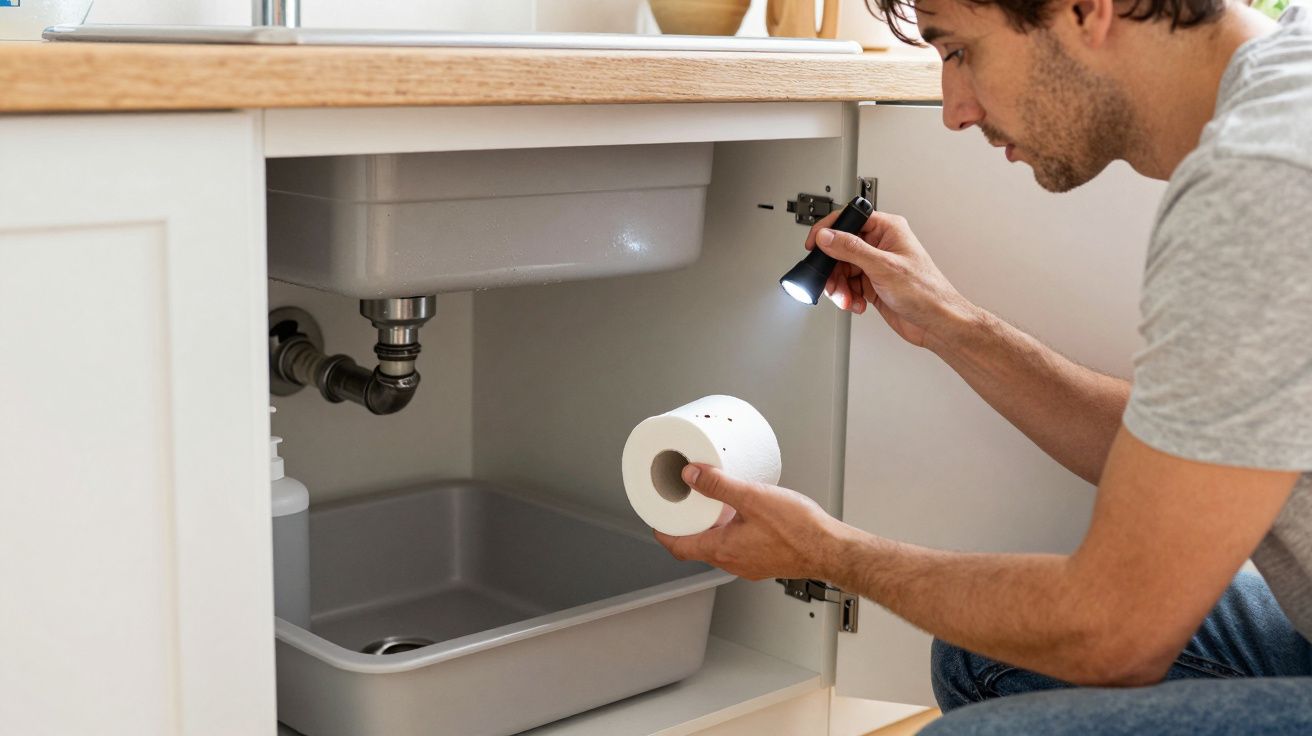
I first noticed it while unloading the dishwasher: a damp shine at the back of the under-sink unit, the kind you wipe away and forget. Visible pipe leaks are like that - small, obvious, and weirdly easy to dismiss - until they start triggering structural damage in the parts of your kitchen you can’t see. The problem isn’t just the drip. It’s what happens when water use ramps up and that drip becomes a daily soak.
At low usage, a tiny leak can look “stable”. Then someone starts working from home, the washing machine runs more, the heating kicks in, guests stay over, and the moisture budget changes overnight. Same leak, bigger consequences.
Why “a small drip” turns nasty when you use the room more
Most cabinets and floors don’t fail because of one dramatic flood. They fail because they spend weeks being quietly fed water.
When you increase usage - more handwashing, more dishwashing, more hot-to-cold cycling - you increase three things at once: pressure events, temperature swings, and time-in-contact. Joints flex. Compression fittings relax a fraction. Plastic traps shift when they’re bumped by cleaning bottles. That’s how a drip that only showed at night becomes a constant wet line.
The other multiplier is evaporation. A little leak can “self-hide” when the cupboard is warm and airy. Pack the cabinet with bins, close the doors, run the heating less, and airflow drops. Moisture lingers, and the cabinet starts living in a microclimate that timber and chipboard were never designed for.
Where the damage actually starts (hint: not where you’re looking)
Water is lazy but persistent: it follows gravity, edges, and seams. Under a sink, that means the back panel, the baseboard, and the corners - the places you don’t check unless something smells off.
Common pathways I see people miss:
- Along the pipe, then down the cabinet side like a hidden gutter.
- Behind the waste pipe, pooling under the back edge where your hand can’t reach.
- Through screw holes and joints in the cabinet base, swelling the board from underneath.
- Across the floor under the kickboard, where it spreads thinly and never “puddles”.
If you have laminate or engineered boards, thin water film is enough. It works into joins, lifts edges, and turns a tight seam into a permanent ridge. Tiles can hide it too; the grout line might darken slightly, then you get a loose tile months later and wonder why.
What visible pipe leaks do to cabinets and floors, step by step
The timeline is depressingly predictable. It just doesn’t feel dramatic while it’s happening.
- Swelling and softening: chipboard base panels puff up first, especially around the sink cut-out and corners.
- Delamination: the “skin” lifts, the board turns spongy, and screws lose bite. Hinges start to feel off.
- Mould and odour: not always obvious black spots - often a sweet, stale smell and persistent dampness on cleaning cloths.
- Floor movement: laminate edges curl, vinyl blisters, or grout starts to crumble as the subfloor stays wet.
- Structural damage: not “the house is falling down”, but rotten battens, weakened subfloor, and compromised fixings that make repairs bigger and pricier.
That last step is where people get caught. Replacing a trap is quick. Replacing a swollen cabinet base plus a section of floor and skirting is a weekend (or a bill) you didn’t plan for.
The “usage increase” moments that accelerate everything
Leaks don’t get worse in a vacuum; they get worse when life changes slightly.
Look out for these triggers:
- A new dishwasher or washing machine cycle frequency (or a new appliance with slightly different hose tension).
- Boiler/heating adjustments that change hot water temperature and pipe expansion.
- Kids home more often (more taps, more baths, more “left it running”).
- A loft conversion or extension that changes household pressure or introduces vibration through pipe runs.
- A deep clean where bottles or bins knock the waste pipe out of alignment by millimetres.
The point is not to panic. It’s to recognise that “it’s only a drip” often means “it hasn’t been stress-tested yet”.
A quick, realistic check you can do in five minutes
You don’t need fancy kit to catch 80% of problems early. You need a dry surface and a reason to look.
- Dry everything under the sink, including the back corners.
- Run the tap hot, then cold, and watch joints with a torch: trap connections, isolation valves, flexi hoses.
- Pull a sheet of kitchen roll along the underside of pipes and fittings; it shows moisture you can’t see.
- Check the cabinet base for raised texture, soft spots, or a “bubble” under the lining.
- Look at the floor edge by the kickboard: any lifting, darkened grout, or springy feel matters.
If you find water, don’t just tighten blindly. Over-tightening plastic fittings can distort seals, and a “fixed” joint can start weeping again the next time it heats up.
“If the cupboard smells damp, the leak has already had time,” a plumber once told me. “Water is patient; chipboard isn’t.”
What to do if you’ve already got swelling or staining
Once boards have puffed, they rarely go back. Your goal becomes: stop the source, dry properly, and prevent spread.
A practical order of operations:
- Stop the leak (replace washer/seal/trap, or get a plumber if it’s a supply line).
- Increase drying: doors open, gentle heat, airflow. A dehumidifier helps more than a fan alone.
- Remove soaked items and any matting or liners trapping moisture.
- Inspect the toe-kick area and adjacent units; water travels sideways.
- If flooring has lifted, assume moisture is underneath and don’t seal it in with silicone “to tidy it up”.
If you’re renting, photograph everything early and report it. If you own, keep receipts and notes - not for drama, but because water damage claims and guarantees are all about timelines.
The small habits that prevent big repairs
Most prevention isn’t technical. It’s boring, repeatable, and cheap.
- Keep the under-sink space uncluttered enough that you can see the pipes.
- Don’t store liquids directly on the cabinet base; use a tray with a lip.
- Check after any plumbing work or appliance install, then check again a week later.
- Treat new smells and warped edges as evidence, not aesthetics.
Visible pipe leaks don’t usually destroy kitchens overnight. They do it the slow way - and faster than you think once water use goes up.
| Early sign | What it often means | Best next step |
|---|---|---|
| Musty smell in the sink unit | Ongoing damp, poor airflow | Empty cupboard, dry, inspect joints |
| Swollen cabinet base edge | Water pooling or wicking | Fix leak, assess board integrity |
| Floor seam lifting near units | Moisture under flooring | Stop source, dry thoroughly, don’t seal |
FAQ:
- How do I know if it’s a “real” leak or just condensation? Condensation tends to appear as a fine, even moisture on cold pipes during specific conditions. Leaks usually form at joints, leave tracks, or reappear quickly after drying and running the tap.
- Can I just put a bowl under it and deal with it later? A bowl catches drips, not wicking. Water can still run along pipework and soak into cabinet panels and flooring edges, which is where the long-term damage starts.
- Is tightening the fitting always the right fix? Not always. Plastic traps and compression joints can be damaged by over-tightening. If you can’t identify the exact joint and sealing method, it’s safer to replace the washer/seal or call a plumber.
- What’s the fastest way to dry an under-sink cabinet? Stop the leak first, then maximise airflow and remove anything trapping moisture. A dehumidifier in the kitchen (doors shut) often outperforms a fan alone.
- When should I worry about structural damage? If the cabinet base is soft, flooring is lifting, or there’s persistent damp/mould despite drying, the moisture may have reached subfloor or battens. That’s the point to get a professional assessment.


Comments (0)
No comments yet. Be the first to comment!
Leave a Comment