Water doesn’t usually arrive with drama. It arrives with a quiet hiss under the sink, or a washing machine hose that finally gives up, and suddenly you’re hunting for stop valves as if they were hidden in a puzzle box. In that moment, emergency control isn’t a policy document - it’s a hand on the right lever, fast enough to turn a mess into a near-miss.
Yet the inspection detail that prevents floods is almost offensively small: whether the shut-off actually works, is reachable, and is labelled like someone might need it in a panic. It keeps “happening” because the valve is there, on paper, while in real life it’s seized, buried, or unknown.
The tiny check that changes the outcome
The test is simple. Don’t just look for a valve; operate it.
A working stop valve should close fully with reasonable force, without spinning endlessly, and without weeping from the spindle afterwards. If it’s a lever valve, it should move cleanly from open to closed; if it’s a wheelhead, it shouldn’t feel like you’re grinding gravel. The point isn’t elegance. It’s certainty.
The second part is even more human: can you reach it quickly, and would you know it’s the right one? Behind a washing machine, under a sink crammed with cleaning products, or in a cupboard nobody opens, “accessible” becomes a polite fiction. In a real leak, seconds get spent moving boxes and swearing, not shutting off water.
Why this keeps getting missed (even in “good” properties)
It’s not because people don’t care. It’s because valves sit at the awkward intersection of responsibility, habit, and time.
A lot of inspections are visual. Someone ticks “isolation present”, takes a photo of a chrome handle, and moves on. The problem is that valves are mechanical, and mechanical things fail quietly when they’re left alone for years. Let’s be honest: nobody exercises their shut-offs for fun.
There’s also the split-brain of buildings. A homeowner assumes the plumber checked. A landlord assumes the agent checked. The agent assumes maintenance will deal with it “if there’s a problem”. The first person to discover the problem is often the one standing in water.
Common real-world culprits show up again and again:
- The valve exists but is painted over, scaled up, or seized from disuse.
- It’s installed the “right” way for the pipework, but the “wrong” way for a human (behind appliances, too low, too tight).
- It’s unlabelled, or labels have faded, so emergency control becomes guesswork.
- There’s a valve on one line but not where you need it (no isolation to a single fixture, only to the whole property).
A practical stop-valve inspection you can do in 10 minutes
You’re not trying to overhaul the plumbing. You’re trying to make the next emergency boring.
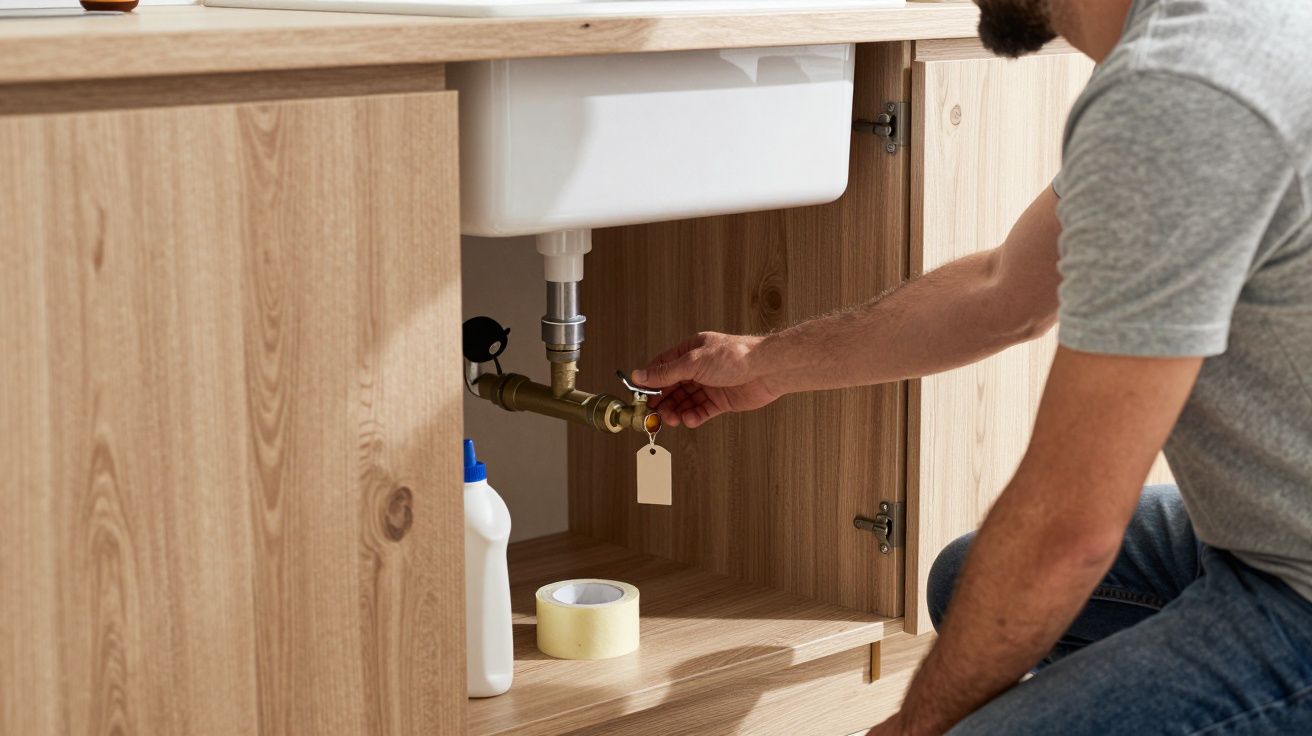
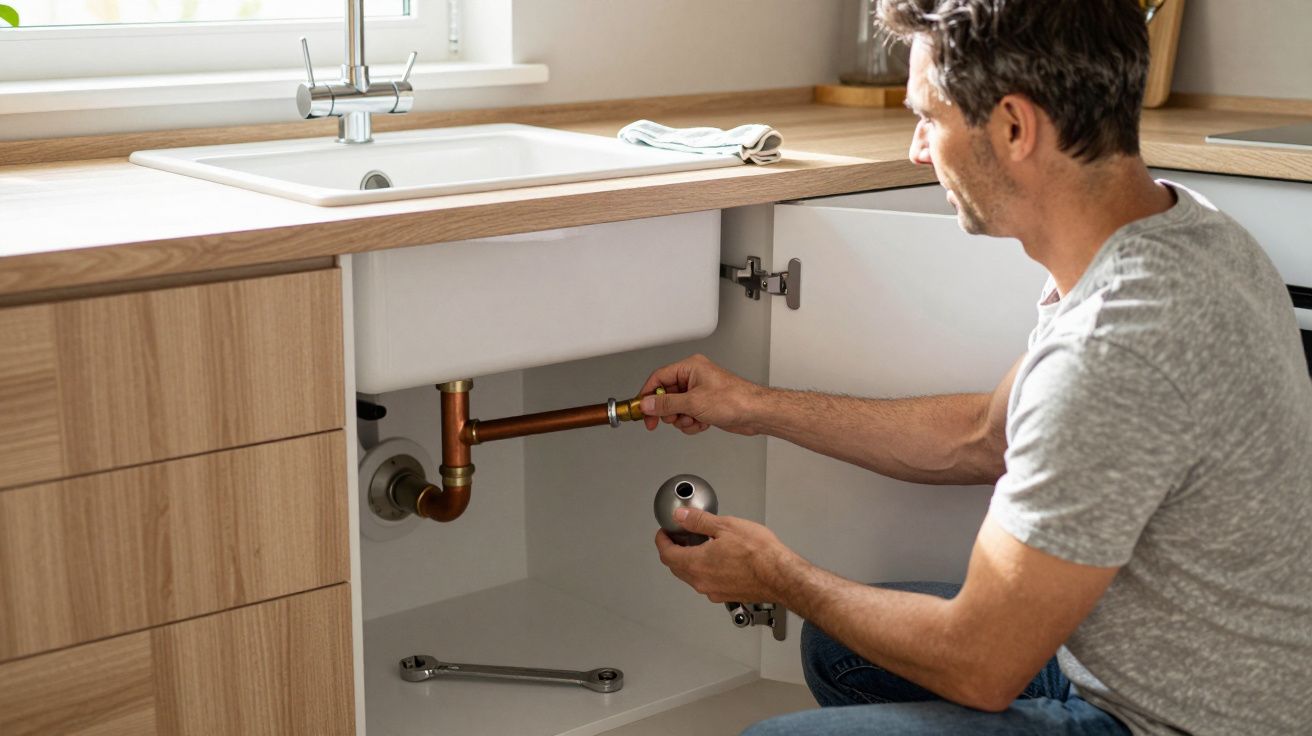
- Find the main stop valve (often under the kitchen sink, in a utility room, or near where the water main enters). Clear access now, while you’re calm.
- Test the movement: turn it towards closed until it stops. Don’t force it to destruction; if it won’t move with sensible pressure, treat that as a fail.
- Confirm it actually isolates: open the cold tap at the kitchen sink. The flow should die down and stop.
- Reopen fully, then back a fraction: some wheelhead valves last longer if they’re not jammed hard against the open stop.
- Check for drips around the spindle and joints after operating. A valve that seals but then leaks is still a problem.
- Label it with something blunt: “MAIN WATER OFF”. If there are multiple, add arrows or notes.
If the valve is inaccessible, make it accessible. That can be as simple as re-organising the cupboard so your hand can reach it in one move, or as real as paying a plumber to relocate it. It’s hard to overstate how much damage is prevented by not having to move a washing basket while water runs.
“The biggest flood claims I see aren’t exotic failures - they’re long minutes looking for a shut-off,” a restoration contractor once told me. “The valve’s there, but it’s not usable.”
The emergency-control mindset: isolate by zones, not by luck
The main stop valve is the big hammer. It’s also disruptive: it kills water to everything, which can turn a small leak into a household crisis if someone needs a toilet, or you’re mid-shower, or you have tenants.
The smarter pattern is to treat stop valves as emergency control points, arranged the way people actually live:
- Main isolation: one valve that reliably shuts off the whole incoming supply.
- Local isolation: valves for the usual culprits - WC cistern, basin, washing machine, dishwasher, outside tap.
- Know the shut-off sequence: if a flexi hose bursts, you want “local first, main if needed”, not a frantic sprint.
This is where inspections often underperform. People confirm the main valve exists, but don’t verify the small local ones, and those are the ones you need when a single fixture fails at 2 a.m.
What to do if the valve fails the test
If it won’t move, won’t shut fully, or leaks after you touch it, don’t “leave it for later”. Later tends to be when you’re already dealing with water damage.
Your options are straightforward:
- Replace with a quality full-bore lever valve for the main isolation where possible. They’re usually easier to operate quickly and less prone to the “spins forever” problem.
- Add a secondary stop valve in series, so you’re not reliant on a single ageing fitting.
- Fit local isolation valves where none exist, especially on appliances with hoses.
- Improve access: relocation, an access hatch, or simply making space and adding a label.
If you’re in a flat, also find out how to isolate at the building level. In some blocks, the “main” for your flat is in a communal riser cupboard you can’t access without a caretaker, which changes the emergency-control plan entirely.
| Inspection detail | What “pass” looks like | Why it prevents floods |
|---|---|---|
| Operability | Turns smoothly, closes fully | You can stop flow fast under stress |
| Accessibility + labelling | Reachable in seconds, clearly marked | No time lost searching or guessing |
| Post-test integrity | No weeps/drips after use | Prevents a new leak created by the “fix” |
FAQ:
- How often should I test my stop valves? About every 6–12 months, and after any plumbing work. If you’re a landlord, align it with routine inspections.
- Is it safe to turn the main stop valve off and on? Generally yes, but old valves can fail when disturbed. That’s exactly why testing matters - do it at a sensible time, and replace anything that weeps or sticks.
- What if I can’t find the main stop valve? Check under the kitchen sink, utility room, near the water meter, or where the supply enters the property. If it’s still unclear, a plumber can trace it quickly.
- Should I rely on the building’s shut-off in a flat? Treat it as a back-up. You want an isolator within your own flat for true emergency control, because access to communal valves can be slow.


Comments (0)
No comments yet. Be the first to comment!
Leave a Comment